Why You Will Love This Recipe
Imagine a dessert that combines the salty crunch of pretzels with the creamy, nutty goodness of peanut butter, all without the need to turn on your oven. That’s exactly what these No-Bake Peanut Butter Pretzel Bars offer. They’re perfect for those who crave a quick and easy treat that doesn’t skimp on flavor. Whether you’re a busy parent, a college student, or just someone who loves a good dessert, this recipe is your ticket to sweet satisfaction.
These bars are not only delicious but also incredibly versatile. You can whip them up in a matter of minutes, making them ideal for last-minute gatherings or a spontaneous sweet tooth craving. Plus, the combination of textures — the crunch of the pretzels and the smoothness of the peanut butter mixture — creates a delightful contrast that keeps you coming back for more. Trust us, once you try them, you’ll be hooked!
Ingredients
- 2 cups crushed pretzels
- 1 cup creamy peanut butter
- 1/2 cup unsalted butter, melted
- 1 1/2 cups powdered sugar
- 1 cup chocolate chips
- 1 tablespoon coconut oil
Step by Step Instructions
- Prepare the Pretzel Base: Start by crushing the pretzels into small pieces. You can do this by placing them in a zip-top bag and using a rolling pin to break them down. In a large bowl, combine the crushed pretzels with the melted butter and powdered sugar. Mix until well combined.
- Create the Peanut Butter Layer: Add the creamy peanut butter to the pretzel mixture and stir until everything is evenly coated. Press this mixture into the bottom of a lined 9×13 inch pan, ensuring it’s compact and even.
- Melt the Chocolate: In a microwave-safe bowl, combine the chocolate chips and coconut oil. Microwave in 30-second intervals, stirring in between, until the chocolate is fully melted and smooth.
- Assemble the Bars: Pour the melted chocolate over the pretzel-peanut butter base, spreading it evenly with a spatula. Place the pan in the refrigerator for at least 1 hour, or until the bars are set.
- Serve: Once set, remove the bars from the pan and cut into squares. Enjoy your delicious no-bake treat!
You Must Know
These bars are incredibly forgiving, making them perfect for beginner bakers or those who might not feel confident in the kitchen. The no-bake aspect means there’s no risk of burning or overcooking, and the ingredients are simple and easy to find. However, it’s essential to ensure that your pretzel pieces are not too large, as this can make the bars difficult to cut and eat.
Another key point to remember is the importance of allowing the bars to set in the fridge. This step is crucial for achieving the right texture and ensuring that the layers hold together when sliced. Patience is key here, but the wait is undoubtedly worth it when you take that first bite.
Storage Tips
To keep your No-Bake Peanut Butter Pretzel Bars fresh, store them in an airtight container in the refrigerator. They will stay delicious for up to a week, making them a great make-ahead option for parties or as a treat to enjoy throughout the week. If you want to keep them for longer, consider freezing them. Simply wrap each bar individually in plastic wrap and place them in a freezer-safe bag. They can be frozen for up to three months.
When you’re ready to enjoy a frozen bar, let it thaw in the refrigerator overnight or at room temperature for about 30 minutes. This way, you’ll always have a sweet treat ready whenever the craving strikes.
Ingredient Substitutions
If you’re looking to switch things up or accommodate dietary restrictions, there are plenty of substitutions you can make. For a nut-free version, try using sunflower seed butter or soy nut butter in place of peanut butter. If you’re avoiding dairy, opt for a dairy-free butter alternative and use dairy-free chocolate chips.
For those who prefer a less sweet treat, you can reduce the amount of powdered sugar or substitute it with a natural sweetener like honey or maple syrup. Just keep in mind that these substitutions may slightly alter the texture and flavor of the bars, but they’ll still be delicious.
Serving Suggestions
These bars are incredibly versatile and can be enjoyed in various ways. Serve them as a dessert at your next gathering, or pack them as a sweet snack for a picnic or road trip. They pair wonderfully with a cold glass of milk or a hot cup of coffee, making them a delightful treat any time of day.
For a fun twist, try crumbling the bars over a bowl of ice cream or yogurt. The combination of creamy and crunchy textures is sure to be a hit. You can also drizzle some extra melted chocolate or caramel sauce on top for an indulgent finish.
Cultural Context
No-bake desserts have a long-standing place in culinary traditions across the world. They are especially popular in regions where hot weather makes using an oven less desirable. The combination of peanut butter and chocolate is a classic American pairing, beloved for its sweet and salty harmony.
Pretzels, with their origins in Europe, bring a unique twist to this American favorite, adding a layer of crunch and a hint of saltiness that balances the sweetness of the other ingredients. This recipe is a wonderful example of how different culinary traditions can come together to create something truly delightful.
Pro Tips
For the best results, ensure that your ingredients are at room temperature before you begin. This will help them combine more easily and create a smoother texture. When melting the chocolate, be sure to stir it frequently to prevent it from burning or seizing.
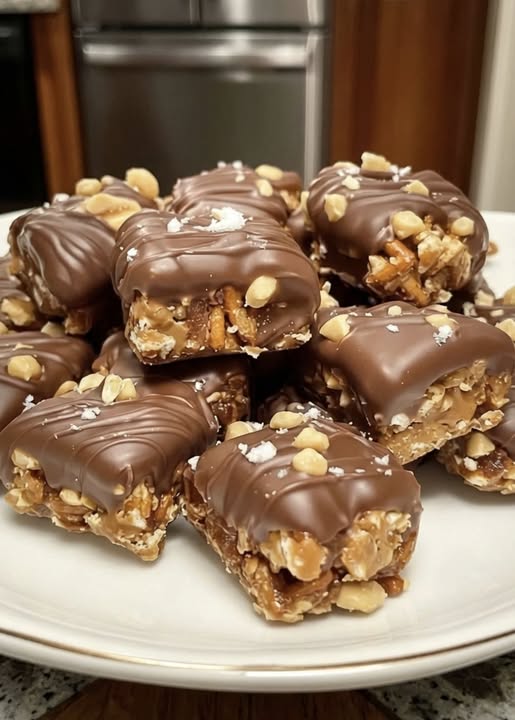
If you’re looking to add a bit of flair to your bars, consider sprinkling some sea salt or crushed pretzels on top of the chocolate layer before it sets. This not only adds visual appeal but also enhances the flavor profile, making each bite even more irresistible.
Recipe FAQs
Can I use crunchy peanut butter instead of creamy? Yes, using crunchy peanut butter will add extra texture to your bars. Just be aware that it might make the mixture a bit harder to spread evenly.
What if I don’t have coconut oil? You can substitute coconut oil with vegetable oil or butter. The purpose of the oil is to help the chocolate set smoothly and give it a glossy finish.
How do I prevent the bars from sticking to the pan? Lining your pan with parchment paper is the best way to prevent sticking. Make sure to leave some overhang on the sides so you can easily lift the bars out once they’re set.