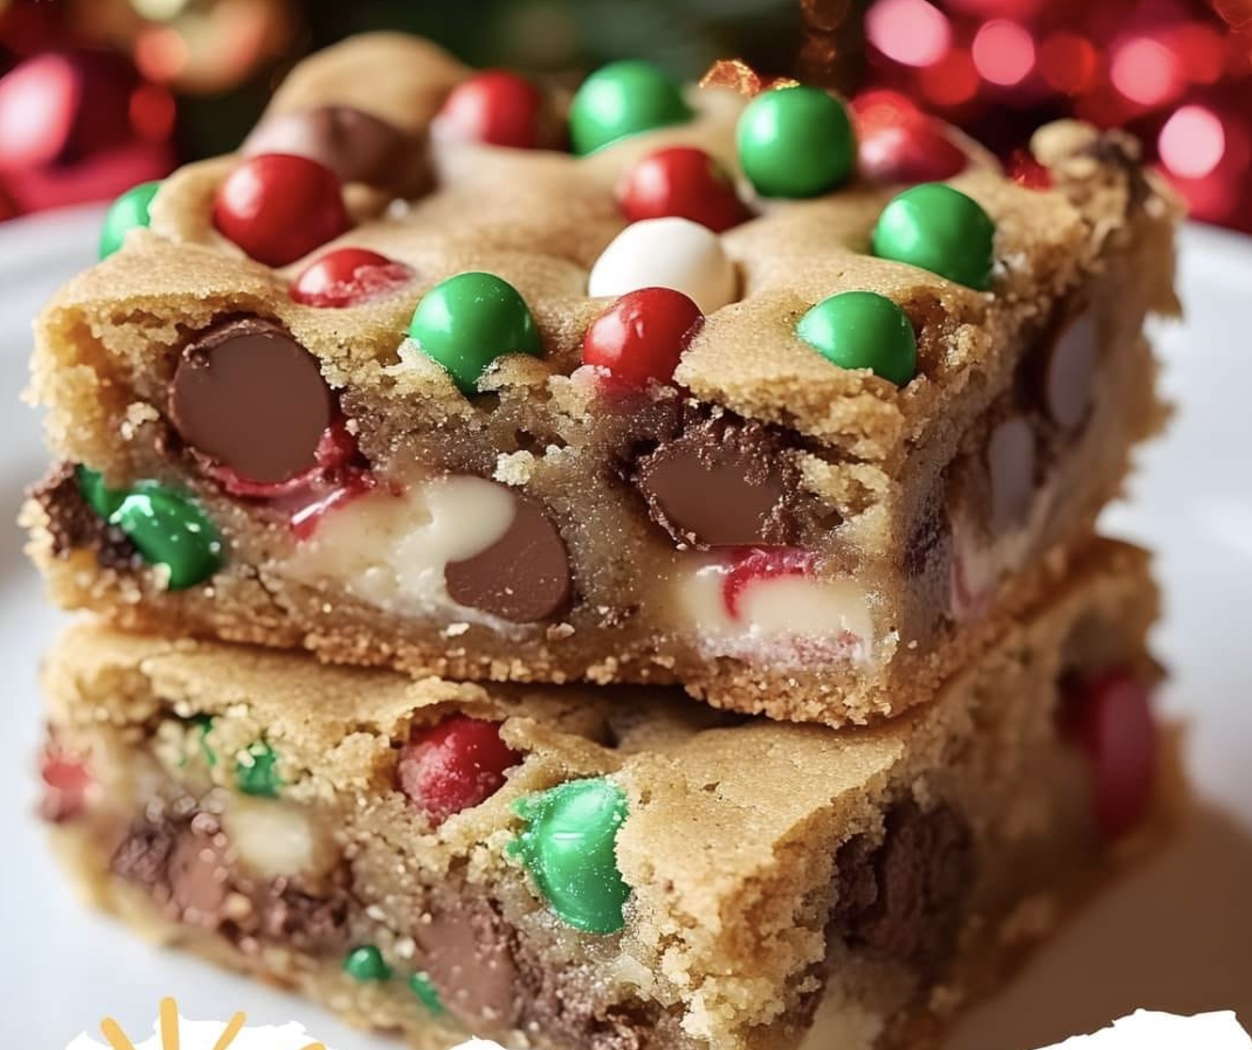
Hello, holiday bakers! Are you ready to make your festive celebrations even sweeter? This Christmas Cookie Bars recipe is your ultimate holiday treat. Packed with colorful candies, white chocolate chips, and cheerful sprinkles, these bars are as fun to make as they are to eat. Whether for a party, a gift, or a cozy family night, these cookie bars are guaranteed to spread holiday cheer.
Introduction
Christmas Cookie Bars are the perfect dessert to bring festive joy to any occasion. Combining the buttery richness of cookies with the convenience of bar baking, they’re ideal for holiday gatherings and cookie exchanges. Their colorful appearance and irresistible flavor make them a favorite among both kids and adults. Plus, their easy preparation means you can spend more time enjoying the holidays and less time in the kitchen. Let’s dive into this simple yet indulgent recipe and create a new holiday tradition.
Ingredients
Wet Ingredients:
- 1 cup (226g) unsalted butter, softened
- 1 cup (200g) granulated sugar
- ½ cup (100g) brown sugar
- 2 large eggs
- 2 teaspoons vanilla extract
Dry Ingredients:
- 2 ½ cups (310g) all-purpose flour
- 1 teaspoon baking powder
- ½ teaspoon baking soda
- ½ teaspoon salt
Mix-Ins:
- 1 cup (180g) red and green chocolate candies (like M&Ms)
- ½ cup (90g) white chocolate chips
- ¼ cup (40g) holiday sprinkles
Instructions
- Preheat Your Oven: Set your oven to 350°F (175°C) and prepare a 9×13-inch baking pan by greasing it or lining it with parchment paper. This ensures the bars come out easily without sticking.
- Cream Butter and Sugars: In a large mixing bowl, beat the softened butter, granulated sugar, and brown sugar together using a hand or stand mixer. Continue until the mixture becomes light, fluffy, and pale in color. This step is crucial for achieving a soft and chewy texture in your cookie bars.
- Add Eggs and Vanilla: Beat in the eggs one at a time, ensuring each is fully incorporated before adding the next. Then mix in the vanilla extract to infuse the batter with a warm, sweet aroma.
- Combine Dry Ingredients: In a separate bowl, whisk together the flour, baking powder, baking soda, and salt. Slowly add the dry ingredients to the wet mixture, mixing on low speed until just combined. Avoid overmixing, as this can lead to tough cookie bars.
- Mix in the Goodies: Gently fold in the red and green chocolate candies, white chocolate chips, and half of the holiday sprinkles. This ensures every bite is bursting with festive flavor.
- Prepare the Dough in the Pan: Spread the dough evenly into your prepared baking pan, pressing it down into an even layer with your hands or a spatula. Sprinkle the remaining holiday sprinkles on top for a festive finish.
- Bake to Perfection: Place the pan in the oven and bake for 25-30 minutes. You’ll know they’re done when the edges turn golden brown and the center is set but still slightly soft.
- Cool and Cut: Allow the cookie bars to cool completely in the pan before cutting them into squares. This step is essential for clean slices and a firm texture.
Helpful Tips
- Measure Flour Accurately: For best results, spoon the flour into your measuring cup and level it off with a knife. Too much flour can make the bars dry.
- Room Temperature Ingredients: Ensure your butter and eggs are at room temperature for easier mixing and a smoother batter.
- Holiday Variations: Swap the red and green candies for pastel colors in the spring or orange and black for Halloween to enjoy these bars year-round.
- Storage Tip: Store leftovers in an airtight container at room temperature for up to five days or freeze for longer shelf life.
Cooking Tips
Use a light-colored metal baking pan to prevent the edges from browning too quickly. If using a glass pan, reduce the oven temperature to 325°F to ensure even baking. For perfectly chewy cookie bars, avoid overbaking; the residual heat will continue to cook the bars after you remove them from the oven. To create perfectly even slices, use a long, sharp knife and wipe it clean between cuts.
Serving Suggestions
These cookie bars are versatile and can be served warm or at room temperature. Pair them with a cold glass of milk, hot cocoa, or your favorite holiday tea for a cozy treat. For a festive dessert platter, arrange them with other holiday cookies like gingerbread men or sugar cookies. Wrap individual bars in cellophane with a festive ribbon for a thoughtful homemade gift.
Nutritional Information (per serving)
- Calories: 220
- Carbohydrates: 28g
- Protein: 2g
- Fat: 12g
- Saturated Fat: 7g
- Cholesterol: 35mg
- Sodium: 100mg
- Sugar: 20g
- Fiber: 1g
- Vitamin A: 4%
- Calcium: 2%
- Iron: 6%
Storage and Leftovers
Keep leftover Christmas Cookie Bars fresh by storing them in an airtight container. They’ll stay soft and chewy for up to five days at room temperature. To freeze, wrap individual bars in plastic wrap, then place them in a freezer-safe container for up to three months. When ready to enjoy, thaw at room temperature or warm them in the microwave for a few seconds.
Frequently Asked Questions (FAQs)
Can I substitute the white chocolate chips?
Yes! Swap the white chocolate chips for dark chocolate, milk chocolate, or even butterscotch chips for a flavor twist.
Can I make this recipe gluten-free?
Absolutely. Replace the all-purpose flour with a 1:1 gluten-free baking flour for a gluten-free version.
What if I don’t have red and green candies?
You can use regular chocolate candies or chop up colored candy melts for the same festive effect.
How can I make these bars extra soft?
Be sure not to overmix the batter and avoid overbaking. Both steps will help maintain a soft and chewy texture.
Related Recipes
If you love these Christmas Cookie Bars, you might also enjoy:
- Soft Gingerbread Cookies with Icing
- Classic Holiday Sugar Cookies
- Double Chocolate Peppermint Bark
- Spiced Eggnog Bread
Conclusion
Christmas Cookie Bars are a delightful addition to any holiday celebration. Their festive colors, chewy texture, and buttery flavor make them a treat that everyone will love. Whether you’re baking for a holiday party, preparing gifts, or simply indulging in the season’s spirit, this recipe is sure to be a hit. Try them out and let these bars bring a little extra sweetness to your holidays!