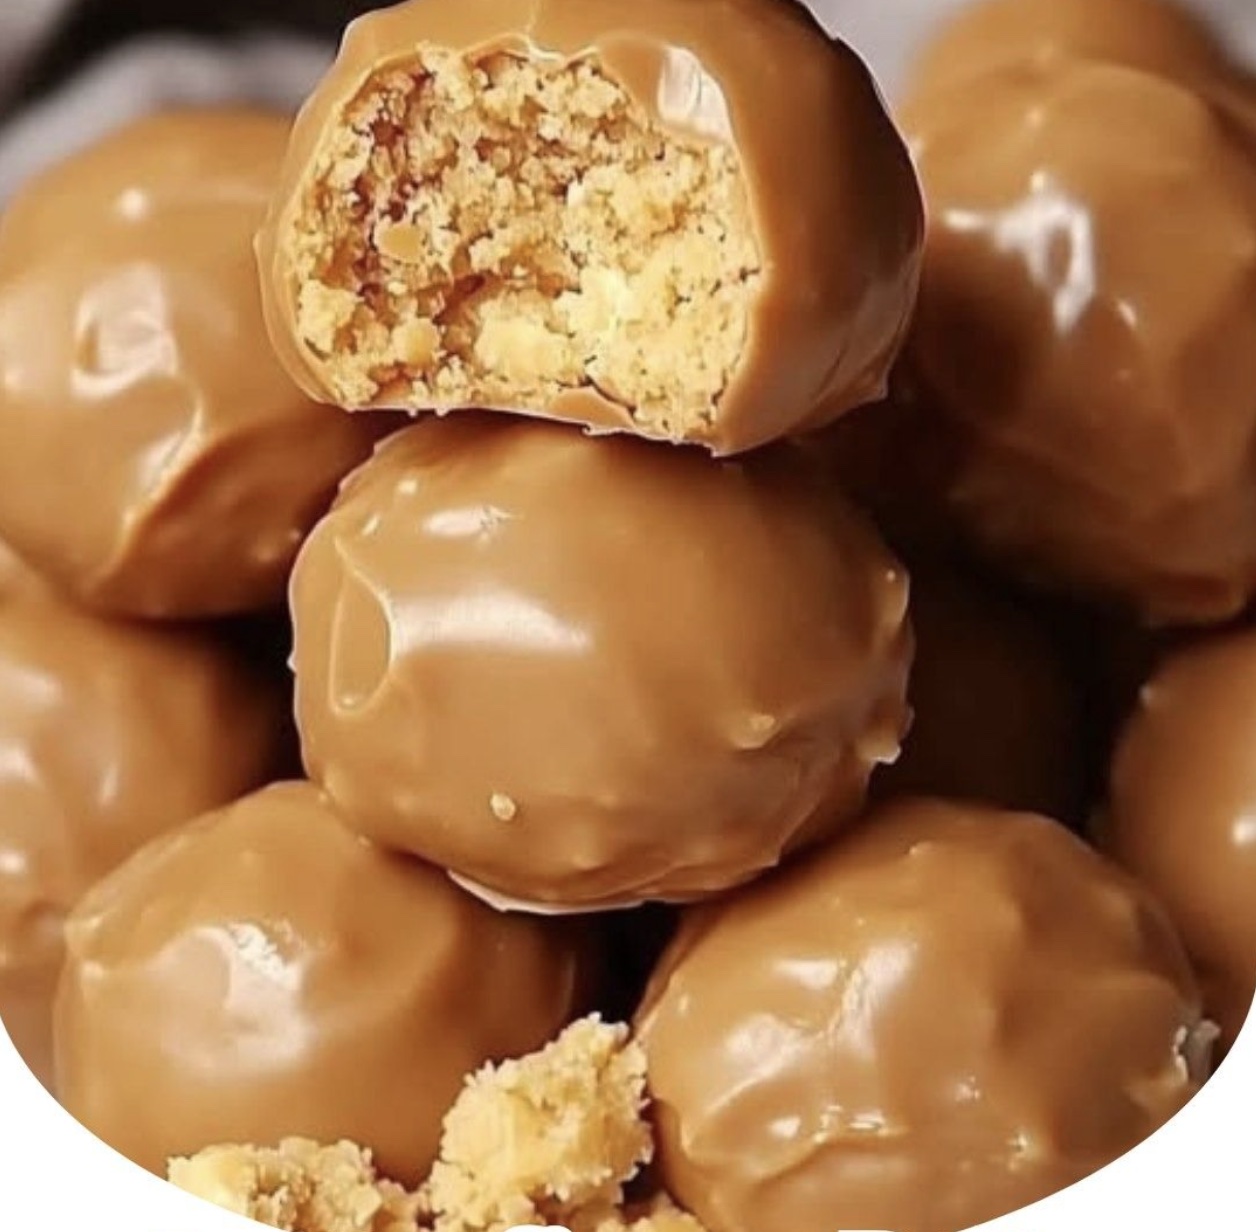
Butterfinger Balls – A No-Bake Peanut Butter Dream You’ll Crave Again and Again 🥜🍫
Get ready to fall in love with these Butterfinger Balls, a no-bake dessert that brings all the peanut butter and chocolate bliss you could ever want into one irresistible bite-sized treat. Creamy, crunchy, sweet, and packed with nostalgic flavor, these little dessert bombs are a hit for any occasion—from holiday parties to after-dinner indulgence.
With just a few simple ingredients, you can whip up a batch of these decadent Butterfinger-inspired treats in under 30 minutes. They’re easy to make, store beautifully, and disappear even faster than you’d expect. No baking. No fuss. Just peanut butter, chocolatey goodness, and all the flavor of your favorite candy bar in truffle form.
Ingredients
• 1 cup creamy peanut butter
• ½ cup butter, softened (unsalted preferred)
• 1 teaspoon vanilla extract
• 1 cup powdered sugar
• Optional: Crushed Butterfinger candy pieces, melted chocolate for coating
Instructions
1. Combine the Base
In a mixing bowl, beat together the softened butter and peanut butter until smooth and creamy. This will create the rich base of your Butterfinger Balls.
2. Add Vanilla and Sugar
Stir in the vanilla extract for added depth of flavor. Gradually add powdered sugar and mix until fully incorporated and the dough is thick but workable. You should be able to roll it into balls without it sticking to your hands.
3. Shape the Balls
Using a tablespoon or small cookie scoop, roll the mixture into bite-sized balls and place them on a parchment-lined baking sheet or plate.
4. Chill to Set
Refrigerate the balls for at least 30 minutes to firm up. This helps them hold their shape and makes them easier to coat if you’re adding chocolate.
5. Optional: Coat in Chocolate or Crushed Butterfingers
For a next-level treat, dip the chilled balls in melted chocolate or roll them in crushed Butterfinger candy. Let them set on wax paper until the coating is firm.
6. Serve and Enjoy
These treats are ready to enjoy right away or can be stored for later. They’re perfect for snacking, gifting, or sweet party trays.
Chef’s Tips
Use a mixer for a super-smooth texture and easier mixing. For extra crunch, stir in crushed Butterfinger bars into the mixture before rolling. Chill the dough for 15 minutes before shaping if it’s too soft. Dip in dark, milk, or white chocolate depending on your flavor preference. Top with crushed peanuts or a sprinkle of sea salt for a gourmet finish.
Serving Suggestions
Serve as part of a dessert board with other no-bake treats like truffles, fudge, and dipped pretzels. Package in small gift boxes or jars for edible holiday gifts. Make mini versions for bite-sized party trays. Pair with a glass of cold milk or a hot espresso for the perfect snack break.
What Chefs Say About This Recipe
Gordon Ramsay – “This is how you elevate candy bar flavor into a gourmet bite. Simple, rich, and deeply satisfying.”
Ina Garten – “A beautiful blend of creamy and crunchy. These are wonderfully nostalgic yet sophisticated.”
Martha Stewart – “Perfect for entertaining or gifting. These treats bring joy in every bite.”
Jamie Oliver – “So easy, so delicious. You’ll want to keep a batch on hand at all times.”
Duff Goldman – “I’m obsessed with how these taste like Butterfingers, but even better. A true no-bake win.”
10 Frequently Asked Questions (FAQs)
- Can I use crunchy peanut butter? Yes, but it will give the balls a chunkier texture.
- Do I have to chill the dough? Yes—chilling helps them firm up and makes coating easier.
- Can I freeze Butterfinger Balls? Absolutely! Freeze in an airtight container for up to 2 months.
- How do I make them gluten-free? Use gluten-free powdered sugar and avoid crushed candy if it’s not certified gluten-free.
- What chocolate works best for coating? Dark chocolate for richness, white chocolate for sweetness, or milk chocolate for balance.
- Can I use almond or cashew butter? Yes, but the flavor will change. Peanut butter is classic for this recipe.
- Are these kid-friendly? Definitely! They’re sweet, fun to make, and great for lunchbox treats or birthday parties.
- Do I need a mixer? It helps, but a spoon and some elbow grease work too.
- Can I add mix-ins? Yes—mini chocolate chips, toffee bits, or even graham cracker crumbs work great.
- How long do they keep? Store in the fridge for up to 1 week or freeze for longer shelf life.
Nutritional Information (Per Ball – Approximate)
Calories: 110
Fat: 9g
Saturated Fat: 3g
Carbohydrates: 6g
Sugar: 5g
Protein: 2g
Sodium: 70mg
Storage and Leftovers
Refrigerate: Store in an airtight container for up to 1 week.
Freeze: Freeze for up to 2 months. Thaw in the fridge before serving.
Do Not Leave Out Too Long: These can soften at room temperature, especially in warm conditions.
Related Recipes You’ll Love
Oreo Dessert Cups
Reese’s Dessert Cups
No Bake Birthday Cake Delight
Rhubarb Cheesecake Squares
Conclusion
These Butterfinger Balls are proof that great desserts don’t have to be complicated. With simple ingredients and zero baking required, they’re perfect for busy weeknights, last-minute party prep, or just indulging in a sweet craving. Whether coated in chocolate or enjoyed plain, each bite is rich, creamy, and packed with nostalgic flavor. Don’t lose this recipe—it’s one you’ll turn to again and again. 🥜🍫 Must express something to keep getting my recipes… Thank you!