Why You Will Love This Recipe
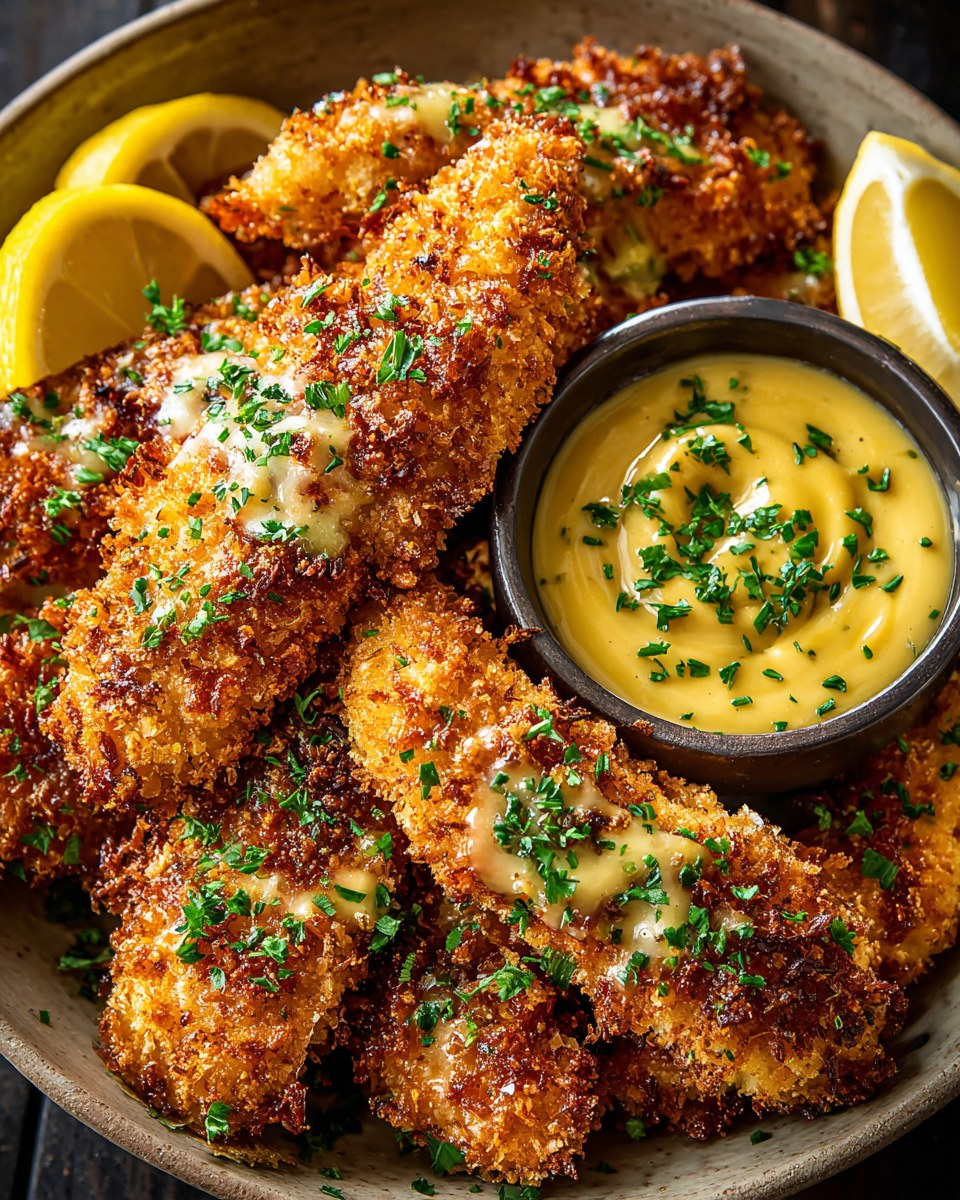
There’s something magical about biting into a perfectly crispy chicken tender. The contrast between the crunchy exterior and the juicy, tender chicken inside is nothing short of culinary bliss. These golden crunchy chicken tenders are not just a meal; they’re an experience. Whether you’re making them for a family dinner or a casual get-together, they’re sure to be a hit. Kids and adults alike will find themselves reaching for more, and you’ll love how easy they are to prepare.
What sets these chicken tenders apart is their homemade charm. Unlike store-bought options, these tenders are made with love and care, ensuring each bite is packed with flavor. The secret lies in the seasoning and the method of preparation, which guarantees a perfect crunch every time. Plus, they’re versatile enough to be paired with various dips and sides, making them a delightful addition to any meal.
Ingredients
- 1 pound of chicken breast tenders
- 1 cup of all-purpose flour
- 2 eggs
- 1 cup of breadcrumbs
- 1 teaspoon of garlic powder
- 1 teaspoon of onion powder
- 1 teaspoon of paprika
- Salt and pepper to taste
- Oil for frying
Step by Step Instructions
- Prepare the chicken: Rinse the chicken tenders under cold water and pat them dry with paper towels. Season with salt and pepper.
- Set up the breading station: In one bowl, place the flour. In a second bowl, beat the eggs. In a third bowl, combine the breadcrumbs with garlic powder, onion powder, and paprika.
- Bread the chicken: Dredge each chicken tender in flour, shaking off any excess. Dip it into the beaten eggs, then coat it thoroughly with the breadcrumb mixture, pressing gently to adhere.
- Fry the tenders: Heat oil in a large skillet over medium-high heat. Once hot, add the chicken tenders in batches, ensuring not to overcrowd the pan. Fry until golden brown and cooked through, about 3-4 minutes per side.
- Drain and serve: Remove the tenders from the oil and place them on a paper towel-lined plate to drain excess oil. Serve hot with your favorite dipping sauce.
You Must Know
Cooking chicken tenders to perfection requires attention to detail. The key is to ensure the oil is at the right temperature before frying. If the oil is too cold, the tenders will absorb too much oil and become greasy. Too hot, and the coating will burn before the chicken is cooked through. A cooking thermometer can be invaluable here, aiming for an oil temperature of around 350°F (175°C).
Additionally, it’s important not to overcrowd the pan. Frying in batches allows the tenders to cook evenly and develop that signature crunch. If you’re making a large batch, keep the cooked tenders warm in a low oven while you finish frying the rest. This way, everyone can enjoy them hot and crispy.
Storage Tips
If you have leftovers (though we doubt you will!), store the chicken tenders in an airtight container in the refrigerator for up to three days. To reheat, place them on a baking sheet and warm them in a 350°F (175°C) oven for about 10 minutes. This will help maintain their crispiness.
For longer storage, you can freeze the cooked tenders. Lay them out on a baking sheet in a single layer and freeze until solid. Then transfer them to a freezer-safe bag or container. Reheat from frozen in a preheated oven to enjoy them as crispy as the day you made them.
Ingredient Substitutions
Feel free to get creative with the seasoning. Swap out the paprika for cayenne pepper if you prefer a bit of heat, or add some Italian seasoning for a herby twist. If breadcrumbs aren’t available, crushed cornflakes or panko can provide an extra crunch.
For a gluten-free version, use a gluten-free flour blend and gluten-free breadcrumbs. You can also experiment with different oils for frying, such as avocado or coconut oil, which can impart a unique flavor to the tenders.
Serving Suggestions
These chicken tenders are incredibly versatile and can be served in numerous ways. Pair them with classic sides like coleslaw and French fries for a traditional meal. For a lighter option, serve them over a bed of mixed greens with a tangy vinaigrette.
They also make a fantastic appetizer for parties. Arrange them on a platter with an array of dipping sauces such as honey mustard, barbecue, or ranch. Your guests will love the variety and the irresistible crunch of these tenders.
Cultural Context
Chicken tenders, also known as chicken fingers or strips, have become a staple in American cuisine, beloved for their simplicity and universal appeal. Originating in the United States, they gained popularity in the 1980s and quickly became a favorite among children and adults alike.
Their widespread appeal is due in part to their versatility and ease of preparation. Whether served in fast-food restaurants or made at home, chicken tenders have become synonymous with comfort food. Their crispy coating and tender meat make them a go-to choice for many, reflecting the American love for fried foods.
Pro Tips
To achieve the ultimate crunch, consider double breading your chicken tenders. After the initial breading, dip them back into the egg mixture and coat them again with breadcrumbs. This extra step ensures an even thicker, crispier crust.
For an added flavor boost, marinate the chicken tenders in buttermilk for a few hours before breading. The buttermilk tenderizes the meat and adds a subtle tang that enhances the overall flavor profile of the tenders.
Recipe FAQs
Can I bake these chicken tenders instead of frying them? Yes, you can bake them in a preheated oven at 400°F (200°C) for about 20 minutes, flipping halfway through. They won’t be as crispy as fried, but still delicious.
What dipping sauces go well with these tenders? Popular choices include honey mustard, barbecue sauce, ranch dressing, or even a spicy sriracha mayo. Feel free to experiment with your favorite flavors!
How can I ensure my tenders are cooked through? Use a meat thermometer to check that the internal temperature of the chicken reaches 165°F (74°C). This ensures they are safe to eat and perfectly cooked.